
December 16, 2013
Call For Test Knitters
December 11, 2013
Battle Lake Craft Sale
Last weekend was the craft sale in Battle Lake. What a great time! There were so many vendors with really wonderful things to sell. Even though the thermometer never hit '0' degrees, there was a great turnout of shoppers. I met so many really fun and interesting people. I didn't have time to look around very much, but I managed a few good trades for myself. I only spent $10 dollars, the rest was barter for yarn!
 I traded some yarn for this wonderful pair of really warm mittens at a booth called Wooly Paws . She makes mittens, hats and more from recycled items. The buttons, thread, wool, and fleece is all repurposed. She makes wonderful funky hats, too. She has been this for many years and has developed her own mitten pattern that is very comfortable. She will even make special orders from your own favorite old sweater! Check out the website.
 I also found some of my favorite soaps lotions, salves and balms. I love this stuff! Wendy, from 'Wendy's Essentials' makes all kinds of wonderful products using essential oils and lots of really 'good for your skin' butters and oils. She makes lip balms and even little carrying cases for them! She spied a skein of multi-colored yarn I had when I was setting up. The next morning she brought me a sample of the little cases she makes made from my own yarn! I later got one of her lip balms to keep in it! Mmmm...lovely. Wendy is also interested in learning to spin. She has a wheel but doesn't quite have the hang of it. We took a look at what she has and I helped her tie on a leader correctly and tried to give some pointers to get her started. Good luck, Wendy!
 Another vendor, Stubborn Oaks Bath and Beauty also caught my eye, and my display. We traded yarn for some wonderful Lemongrass soap, (can't wait to use that!); a Lemongrass and Rosemary lotion bar and a couple other treasures.
There were many, many more kinds of things for sale as well. It was really fun to talk to the other vendors and learn about what they are doing. Their enthusiasm is contagious. Lots of knowledge and talent. I am amazed by the amount of talent and creativity displayed.
I also enjoyed meeting the shoppers. There were people from the area and people from other places who were visiting. So many stories to hear! I love learning about other people and sharing ideas. I think it helps me to keep my craft fresh. It is a great way to get feedback on what I am doing. People are interested in the spinning process and I enjoy explaining it to them and answering questions.
No more sales now for a while. The next event for me is a workshop on Wool Dyeing I will be presenting at Dakota Fiber Mill in Kindred, North Dakota. I will post more on that soon.
December 2, 2013
Tractor Lessons
 |
| Corgi in the snow |
When you live in the country there are certain things that must be considered when there is a winter storm. Things like where are the kerosine heaters, where is the tractor, where are the oil lamps, flashlights, and candles. We have been out of power here for several days at a time. We run a generator that will let us run some combination of the furnace, freezer, well pump or refrigerator for short periods of time. We used the kerosine heaters for four days during one storm. Turns out they work good to cook on too! We made soup, heated water for coffee, even made popcorn on top of the heater. What an adventure that was.

It was about 4:30 pm and would be getting dark soon. I got bundled up and went out to see what I could do about getting the tractor closer to the house and yard. I had never been on this tractor before. Clint gave me instructions over the phone, and a quick run down of the controls. I managed to get it started. It took a few tries, but not too hard. I moved the tractor up to the shop where it could be plugged in, per my instructions. It turned out it was fun to drive round! No wonder he likes it! I went to turn the tractor off. I lowered the throttle, took it out of gear, and turned the key off. The tractor idled very slowly, but didn't quit. I tried putting it in gear and letting the clutch out to kill the engine. No such luck. Finally, I decided that there was only one thing to do. I went back in the house and called Clint.
I explained to the person who answered that I needed him to tell me how to turn off the tractor. While I was waiting for Clint to come to the phone I could hear his coworkers laughing. When he came on the phone and I explained the problem, he said, "Oh, well the tractor won't shut off until you take the boom off and put the blade on, ha, ha, ha". Okay, I said, I'll give it a try. This has always been his job, so I knew nothing about it. I got my instructions. (He also told me how to shut the tractor off.) We also discussed the best place to park it if the snow continues.
Back out I went. I was surprised at how easy it was to get the boom off. I backed the tractor up to the blade and attached that. Piece of cake. I drove the tractor around the garden and up to the house. It as about 5:30 now and very dark. I found the extension cord and got it plugged in and ready to use if I need to plug the tractor in. I am now set. I just hope I don't have to try to start it when it gets really cold. It doesn't like that.

First Snowfall

I got the bug and put up a tree for the holidays for the first time since 2007! It isn't the nine footer I used to put up, but it is a nice tree.

I finished one of the two knitting projects I took on for other people this season.

I designed this scarf to fit the yarn I created. The yarn is 100% wool in two natural colors, grey and white, spun in singles and plied together. It is a sport weight yarn. I had two hundred yards to work with. the person I am knitting for bought the yarn from me earlier. I didn't want the scarf to be too frilly or too blah. I decided to knit a border of all knit stitches three stitches wide on either side and six rows deep on either end. The body is stockinette with rows of eyelets spaces throughout. I added rows of crochet to each end to finish the scarf. I didn't want to used fringe. The scarf turned out to be 8" wide and 48" long. It will be a warm scarf to wear inside or outside of a coat. Now I have one item left to finish and the sale this weekend. Then, the pressure so off!
November 29, 2013
Black Friday...
It even sounds scary! I make it a point to stay safely tucked in at home and away from the madness. I can't imagine getting up in the middle of the night to go out into the crowds of shoppers. There is nothing that I want THAT bad! Some people love it! I don't get it.
One week to go until the sale in Battle Lake. I have been busy spinning up yarn. Mostly, I have been spinning worsted weight yarn out of naturally colored wool. Beautiful shades of brown, fawn, white, grey and silver. While I am spinning I think about all the possibilities of each yarn. I have to squeeze it, smell it, feel how soft it is once it is spun, wash it, and then measure and price it. It surprises me that I ever allow myself to sell any if this! I am also working on a few gifts. I did not take on any knitting projects for other people this year.
It seems that no matter how well I plan, or how much I think I am keeping to a schedule, this time of the year I always feel like I am behind and desperately trying to catch up! I have finally gotten so that by about the 20th of December I call it quits. What is done is done, what is not will be late. I make myself slow down and enjoy the season. Spend time with family and friends and take a look back on the year that was. I try to decide what is important to me for the coming year. This way, when the season has passed I don't feel like I have missed it!
Hope you all had a wonderful Thanksgiving, and or Hanukah. We spent the day with my husband 's family. It is almost impossible to get every one together. We did pretty good this time. We were only missing nephew John and his wife Katy. That is understandable, though, since they live in Russian Mission, Alaska. It takes several plane changes before they even get to Anchorage, let alone back down to Minnesota. Hopefully they will be here at Christmas.
Sorry, no pictures this time!
November 21, 2013
Glamping Here I Come!


My new old camper is a 12' 1969 Forester. The outside just needs some paint. The paint on it isn't that bad, but it is not "glamorous'. I am thinking of white with turquoise accents. The inside is a different story. There is one broken window across the front. And the door needs some work. I also will 'pretty-up' all the trim somehow, not sure just yet. Window boxes might be nice...There is a rack on the back of the camper that could be revamped for extra storage for traveling to shows and sales (or could carry a small motorcycle). The baby moon hubcaps should shine up nicely. An awning would be a nice touch as well.

The inside is a different story. The floor plan is set up so there is a dinette/bed in the front. The bathroom is across from the door. Next to that is the sink and stove. Next to the door and across from the stove is the fridge and next to that is the furnace. There is a sofa that goes across the back that makes into a bed as well. I like the floor plan, I think...but that is the extent of it. I plan to replace the walls, floor, ceiling, and some of the built-ins. I will be making new curtains, painting, building a new table, maybe new benches for the dinette, and pretty much gutting and starting from scratch. I may have a source from some bigger windows. I would like to have a lot of windows and light. The interior will match the exterior. I have seen a lot of cute pictures of vintage camper re-dos and I will have to figure out the best way to fix this to meet my needs. I will post before and after shots of the whole thing so stay tuned!

All in all, I am pretty excited. I think that this will be a lot of work, but should be fun and I know that I will enjoy camping in it. I have a lot of time to think about it...and to do the work. It is November. It snowed here today. Won't be camping for a while now! But..sisters of the road...Here I Come!
By the by, the one major thing missing from this little gem is a name. Any suggestions would be appreciated!
November 15, 2013
New Mittens!
Not all my yarn gets sold...My sister, Sara, is an addicted knitter. She makes beautiful things and can actually finish what she starts! She can finish a lace shawl or a sweater seemingly in no time. I am always amazed by her. Another thing about her is that she is meticulous in what she does. She is a process knitter and so has no problem frogging if something isn't perfect.
 My niece is coming back to Minnesota for the holidays. Sara is making her a slouch hat and wanted some nice fluffy yarn to make it with. She told me she wanted it to be a soft grey. I just happened to have a lovely, silvery-grey roving that I thought would be perfect. I spun the wool into a two-pli yarn that had a lot of loft and softness to it. In return, I got a pair of wonderful mittens that are hand knit in a fair isle pattern. The mittens got done just in time for the perfect weather to wear them. I love my new mittens!
 I also thought I would share another pattern. I have been making a few things to display as samples of what some of my yarns look like knit up. I designed and crocheted this hat in a very short time using about 40 yards of white mohair and 60 yards of wool. I will be posting the pattern as soon as I have it written up.
I look forward to seeing some of you at the Battle Lake High School at the Craft Sale on Dec. 7th. If you get there, be sure to say hello!


I look forward to seeing some of you at the Battle Lake High School at the Craft Sale on Dec. 7th. If you get there, be sure to say hello!
November 7, 2013
Working on some New Yarns

This is the latest. It is a wool and Mohair blend. I did he color blending on the blending board. I have 440 yards of this. It is a worsted weight yarn. (Color 261).
I have also been working on new patterns and knitting up some samples. This is my newest pattern. Fingerless mitts with a thumb gusset using less than 60 yards. I knit these out of mohair on size 8 straight needles. The side seams are sewn. They are very simple to make. Very warm! Great for a last minute gift or for using up your stash.

I will be posting this pattern on my pattern page. I will also post photos of more of my new yarns. Keep watching. Hope to see you in Breckenridge!
November 3, 2013
Made it to the Wheaton Sale
 Well, we got to the sale! Had a wonderful time. We got a great spot. I already reserved the same spot for next year. The products we had were well received. One of the best things about going to events like this is meeting other people who appreciate what you are doing and have their own stories to tell. I saw one piece of information stating that there were seventy vendors. I think it must have ended up being more than that. This sale was huge. I saw several of the vendors and demonstrators from Rosholt there. Some venders have been to this sale several times. Others are first timers like me.
There were all sorts of things for sale. Embroidery, quilting, knitting sewing, soap making, jewelry making, baking to name just a few. The woman in the booth next to me was selling mittens made from wool sweaters. They were lined with flannel or fleece and some had leather patches sewn to the palms. They were very pretty and extremely warm. I wanted to buy a pair, but got too busy! Another vender was selling woven rugs that were really nicely done, including some woven with core-spun alpaca (that if I had, I would have to sleep on it...Mmmmmmm).
My friend Susie was with me. She is the person I have mentioned here before that makes paper. She had a selection of hand folded "keeper boxes", hand made cards, booklets and more.


She also had book markers, books and cards that folded into tree ornaments and more. There was nothing else like it at the sale and people seemed intrigued with her product. People often don't get past the folded crane when thinking about Origami. There is so much more to it. Plus, she had some beautiful handmade paper.

I had all the racks full of yarn in the beginning as well as baskets of skeins. By the time the sale was over the baskets were nearly empty and the racks were getting bare! I have a lot of spinning to do before the next sale in Battle Lake, MN on December 7th.
I had a lot of fun demonstrating the spinning process and blending wool with the blending board. I sold most of my blended yarn so I am already busy making more! People seemed to enjoy seeing how the colors were blended and the wool was prepared for spinning. They are always amazed at the magic of a fluffy piece of wool turning into a strand of yarn! It was fun to explain the whole process from shearing to spinning and dyeing.
I want to thank the Wheaton Area Schools Community Education for hosting this event. Janet Koch did a wonderful job of setting things up and making sure everything ran smoothly. I can't imagine the amount of planning and the work it must take to pull something like this together. The whole event was a lot of fun and I think everyone there was enjoying themselves. I am certainly looking forward to being a part of the 2014 Holiday Craft Fair!
October 30, 2013
Wheaton Holiday Craft Boutique

Today, I will be packing up the wheel. Time to get busy marking all the new yarn. I am really excited about the sale in Wheaton, MN this weekend. There will be seventy
vendors in all. I may have to do a little shopping while I am there....
Besides the yarn, I will have a few books, patterns and a loom for sale. Also, there will be handmade paper items such as bowls, cards and bookmarks, Origami and 'Keeper Boxes'. I will be posting some photos of these after the sale. I plan to take pictures of some of the other booths as well. Watch for these next week.
October 18, 2013
Getting Ready for the Sales!

All of the yarns I sell are farm yarns. They are all raised on my farm or other amall farms and either processed by hand on the farm or in small mills that maintain the individuality of each fleece. All are wool, or a blend of wool and other natural fibers. Each skein is hand spun. Colors are either the actual color from the animal, or dyed by hand with natural dyes, many made from local plants. Some are blended by hand before spinning to produce variegated skeins and more colors. This make every skein unique and provides the chance to work with and create individual, one of a kind projects. Whether the yarns are used alone or combined with other yarn, the end result is totally unique.
I also have been busy developing a class for after the first of the year. I have been asked to present a natural dyeing class at Dakota Fiber Mill near Kindred. We have decided to wait until after the holidays to do the class. I am planning on using several different dye stuffs that don't have too bad a smell...since we will be inside! I also will avoid any really nasty mordants. I think it will be a fun and informative day. I will be posting more information on dates, times, cost, etc. as things come together.
October 15, 2013
Sorry for being a no-show lately....

October 2, 2013
Say Hello to the Blending Board
As much as I enjoy blending colors on a drum carder, I am excited to try another method. I happened to run across a new toy I have to have...a blending board. A blending board is sort of like a flat drum carder. It is used just for blending and not carding. It is best used with roving, locks, sliver, things that are already carded or ready to spin. You don't want to put your fiber on a blending board and then blend it into mud! The idea is to gently blend the fibers together. You decided when they are blended enough.
With a blending board, you have more control over the finished product than you do with a drum. It is much easier to make stripes, repeats, and patterned yarns. You can still add threads, locks, tinsel, and anything else you want to spin into the yarn.
There are several blending boards available. Clemes and Clemes has a really nice one. Moonsong Fiberworks and Paradise Fibers are a couple others. If you look, you will find them. The thing is, they are pretty expensive. They range in price from about $165 to $230 dollars. I decided that I couldn't spend that on another spinning toy right now, so I built one myself.

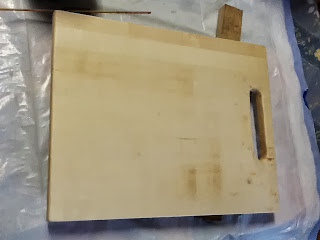
These are the supplies I bought. I had purchased a piece of carding cloth from Naturafiberyarns on Etsy. The size of the cloth was 11 7//8" wide by 12" long with 72 tpi. It only took about a week to get the cloth. I went looking for a cutting board or shelf board that it would fit on, but couldn't find the right size. I finally found a piece of Aspen that was 15" by 36" and 3/4" thick. It was edge glued for extra strength, and was much lighter than some of the cutting boards I looked at.This seemed like it would work well for my purpose.
 The hardware, board and glue were all purchased at a local hardware store. I also picked up a thumb screw, two washers, a T-nut, and a can of 3M 77spray adhesive. (Please, see the comments at the end of this post regarding attaching the carding cloth. I have been made aware tht the cloth should be edge stapled, but never glued).
 I measured the board out to be just slightly wider than the cloth and
about 4 inches longer. I wanted to have a handle at the top. My husband
cut the board for me and also drilled out the handle. I sanded it all
down well so there were no sharp edges or lose wood. Then I put a couple coats of clear polyurethane on it to help protect it. I decided where
the keel would sit on the bottom, drilled a hole and pounded in the
t-nut. Then I had my husband cut the board for the keel.
I measured the board out to be just slightly wider than the cloth and
about 4 inches longer. I wanted to have a handle at the top. My husband
cut the board for me and also drilled out the handle. I sanded it all
down well so there were no sharp edges or lose wood. Then I put a couple coats of clear polyurethane on it to help protect it. I decided where
the keel would sit on the bottom, drilled a hole and pounded in the
t-nut. Then I had my husband cut the board for the keel.

A blending board has a piece called a keel on the bottom of the board. When you are going to use the board, you use the thumb screw to attach the keel to the bottom. Attach it tightly, but no so tight that it won't turn. When you are blending, put the keel between your knees and swivel the board to an angle that is comfortable for you. This is a really nice feature. You don't have to work at weird angles and it makes things much more enjoyable.


When loading the board, simple pull the fiber through the teeth to apply it where you want it. You can make measured, repeating stripes or just add fiber randomly. If you want a certain color or kind of fiber in a particular spot, place it there. You can make batts that are all the same or not, depending on what you want.
With a blending board, you have more control over the finished product than you do with a drum. It is much easier to make stripes, repeats, and patterned yarns. You can still add threads, locks, tinsel, and anything else you want to spin into the yarn.
There are several blending boards available. Clemes and Clemes has a really nice one. Moonsong Fiberworks and Paradise Fibers are a couple others. If you look, you will find them. The thing is, they are pretty expensive. They range in price from about $165 to $230 dollars. I decided that I couldn't spend that on another spinning toy right now, so I built one myself.


 I measured the board out to be just slightly wider than the cloth and
about 4 inches longer. I wanted to have a handle at the top. My husband
cut the board for me and also drilled out the handle. I sanded it all
down well so there were no sharp edges or lose wood. Then I put a couple coats of clear polyurethane on it to help protect it. I decided where
the keel would sit on the bottom, drilled a hole and pounded in the
t-nut. Then I had my husband cut the board for the keel.
I measured the board out to be just slightly wider than the cloth and
about 4 inches longer. I wanted to have a handle at the top. My husband
cut the board for me and also drilled out the handle. I sanded it all
down well so there were no sharp edges or lose wood. Then I put a couple coats of clear polyurethane on it to help protect it. I decided where
the keel would sit on the bottom, drilled a hole and pounded in the
t-nut. Then I had my husband cut the board for the keel.
A blending board has a piece called a keel on the bottom of the board. When you are going to use the board, you use the thumb screw to attach the keel to the bottom. Attach it tightly, but no so tight that it won't turn. When you are blending, put the keel between your knees and swivel the board to an angle that is comfortable for you. This is a really nice feature. You don't have to work at weird angles and it makes things much more enjoyable.


When loading the board, simple pull the fiber through the teeth to apply it where you want it. You can make measured, repeating stripes or just add fiber randomly. If you want a certain color or kind of fiber in a particular spot, place it there. You can make batts that are all the same or not, depending on what you want.
October 1, 2013
Dyeing Wool with Black Walnuts

I found a great source for Black Walnuts Saturday. I found a tree that was dropping walnuts like rain! You have to accept getting hit in the head a few times in payment to the tree for taking her fruit, but it was well worth the trouble (and discomfort...). Within about 15 minutes I had collected more than enough walnuts to use for a class will be teaching as well as to dye plenty of wool for myself. I got them home and stowed them safely away for the night. The next day, I got started.
If you wish to dye with the whole thing, nut and hull, you can place them in a dye pot right away. Make a layer on the bottom of the pot and cover with water. Boil for a couple hours, watching and adding water as needed. then cool, drain, and there is your dye bath. Add enough extra water to this to allow your wool/yarn to move freely in the pot. You don't even have to mordant the wool for dyeing with walnuts, although, you may be able to create different colors if you do.

I filled a dye pot about half full of walnut hulls and covered them with water. I added more water to bring the level to about 3/4 full. I boiled these for two hours. After that time, I removed the pot from the heat and let the hulls steep over night. I also mordanted one pound of wool with alum and Cream of Tarter in the usual way, simmering for an hour and then cooling in the liquid.
I had some Chicken of the Woods that I wanted to try dyeing with. For this, I mordanted half a pound of wool in a 10% ammonia mordant. I let this sit in the mordant for several hours. I did not heat it. I removed the wool from the mordant and rinsed it well with clear water. I then added the wool to the dye bath I had made earlier by boiling the mushrooms in water and straining. I was disappointed with the result, there was little color change. I let this sit over night with no improvement. I rinsed the wool with clear water and decided to over dye it in the walnut dye bath to see how the ammonia mordant would react.
After soaking over night, I strained the dye liquid from the walnut hulls. I decided to add the wool with the ammonia mordant first. I placed the wool in the dye pot and simmered this for a couple of hours. Then I left it to steep and cool. The result was a warm, rich brown. The wool was wonderfully soft. I was concerned with the use of ammonia, but it really doesn't hurt the wool.

I then rinsed the alum mordanted wool and cooled the dyebath so I could add the new wool. I let that simmer for two hours as well. I left it to cool and steep overnight. The next day, I removed it from the pot and washed it with Eucalan Wool Wash. The color is basically the same as the wool mordanted with ammonia, but a bit lighter and more golden.

(The two darker pieces on the end are done with ammonia).
I have the walnuts used for this dye bath soaking in more water. I plan to leave them for a few days and then heat them and let them cool again to see how much color they will produce.I am not sure whether the lighter shade in the second bath is due to the mordant or just that it is the second run in the dye bath. I have a lot more walnuts, wool, mordant, and time to see what colors I can create!
September 27, 2013
It's What's for Dinner!


The chunks for the dye pot went directly onto the stove, covered with water. I simmered these for about an hour and then took them off the heat and left them in the liquid to steep overnight.
After I got done slicing and dicing the mushroom, I cut up some carrots, celery, onions, and garlic. I sauteed the vegetables in butter and olive oil until they started to soften and get tender. I took them out of the skillet and placed them in the stock pot with some chicken stock. Then, I added the mushrooms to the skillet and sauteed them for about 15 minutes. I added some sage, parsley, salt and pepper to the mushrooms.

I then added the mushrooms to the stock pot and simmered the soup for about 45 minutes, until all the vegetables were tender. I checked the seasoning and declared it done!

I called my husband to supper. I let him taste it first, (just in case). He thought it was very good, so I tried it. It really did taste like chicken soup! I think that I would not be so greedy next time and use more of the mushroom. The parts further in really had a texture like chicken. When I make it again, I plan to add some white beans-navy, great northern or cannelli beans for a bit of protein. I can see using this with a white sauce or Alfredo. I am going to harvest more for as long as the weather holds and the mushrooms are producing. Hopefully, I will be able to dehydrate a lot to use over the winter. Meanwhile...Soup's on!
Hunting for Wild Mushrooms
(First, before I start this post, I want to say that I am not an expert on mushrooms by any stretch of the imagination. Make sure if you hunt your own that you have very good guides (use several) or an expert to assist you. Remember...Mushrooms may be deadly poisonous if you get the wrong one by mistake.)
 |
| Taken this morning |
 |
| Taken two days ago |
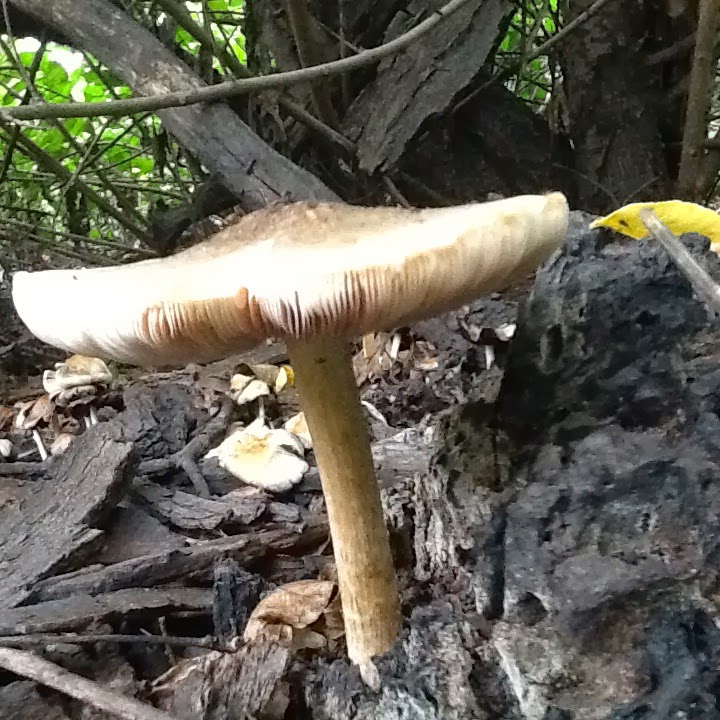
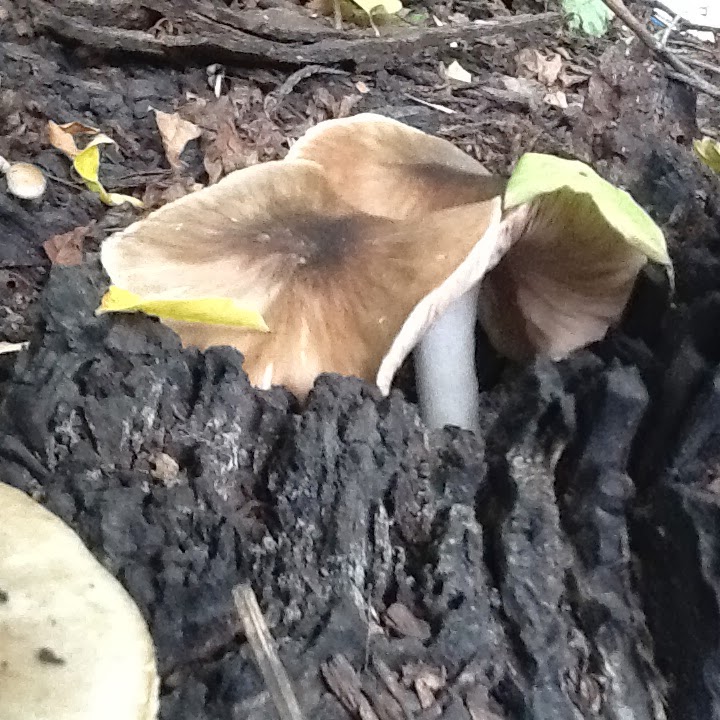
I have never really looked for mushrooms. The only wild one I have ever eaten was a Morel. It was sauteed in butter and tasted delicious. I don't really care for the mushrooms I have bought at the store. My husband is a fan for sure. I have become interested because of the dyeing qualities of mushrooms. So, I headed into the woods this morning and began my hunt. I was pleasantly surprised with what I found.


I found several more flushes of Sulfur Shelf, (Chicken of the woods, or Laetiporus sulphureus) in several places throughout the woods. I found it growing on other trees and in several different areas. Some of the new finds were much bigger than the one I found first. These are some of the new finds!
I also found some Shaggy Mane (Coprinus comatus). This is supposedly a delicious mushroom as well. When new and conical, makes a good substitute for asparagus. I am hoping that with the rains we are having this afternoon and evening I will be able to find some nice ones, enough to harvest. It is never good to take all of anything whether it is a flower or a mushroom, or anything else in nature. Leaving some will ensure that more will grow. Shaggy manes are often said to grow in clumps.


I found several other mushrooms today that I have not yet identified. I don't pick anything that I am not sure of. Mushrooms can be extremely poisonous. the best rule of thumb is, "when in doubt, throw it out". I would amend that to say, "when in doubt, don't touch it"! (If anyone has information on what some of these are, please let me know!)
Once I can identify a mushroom, I want to determine if it is edible. Even if they aren't my favorite, my husband loves them! Many mushrooms that are edible can still cause gastric upset in some people. Even if you determine that a mushroom is edible, for certain, eat a small amount at first to test for a reaction.


There is quite a variety! I plan to try to identify as many as I can and what I can't eat, I may be able to use for dyeing. I have seen some beautiful colors that have come from mushrooms! I hope to figure out how to do it myself.


Could be Turkey tails?

I have a lot more research to do! I also plan to do a lot more hunting. Time is running out this year in this part of the country, but, there is no frost forecast this week!
Tomorrow, I am off to a Fiber Day at Northcroft Farm near Pelican Rapids, MN. Joan Jarvis Ellison and her husband, Dave, host two Fiber Days each year. Joan is a shepherdess. She raises, processes, and sells wool. She has sheep, alpaca, angora goats, and maybe something new! She is a knitter, spinner, weaver, and also a writer. She has a blog called Sheep Notes. She also has several books published. I am not sure how long she has hosted the Fiber Days, but they are well attended. Fiber artists, fiber newbies, and everything in between attend! People come from miles a way. There are always dye pots going and usually someone is demonstrating something. It is inspiring, educational, fun, and always a good time. I am planning to buy some roving. I have used up most of my white from this spring trying out plant dyes! I will let you know what I find!
Subscribe to:
Posts (Atom)